First of all, you'll need to add a solid coping strip on all four sides. Cut it 1-1/2" (will finish at 1"). I used the same fabric as my center applique block but you can use anything that will contrast with your first pieced border. You can measure your center before cutting your strips and then pin the two ends before sewing it together. That way your strips won't be wavy. I sew my strips to the top and bottom first. I always press towards the strips since they aren't pieced and I want them to "pop".
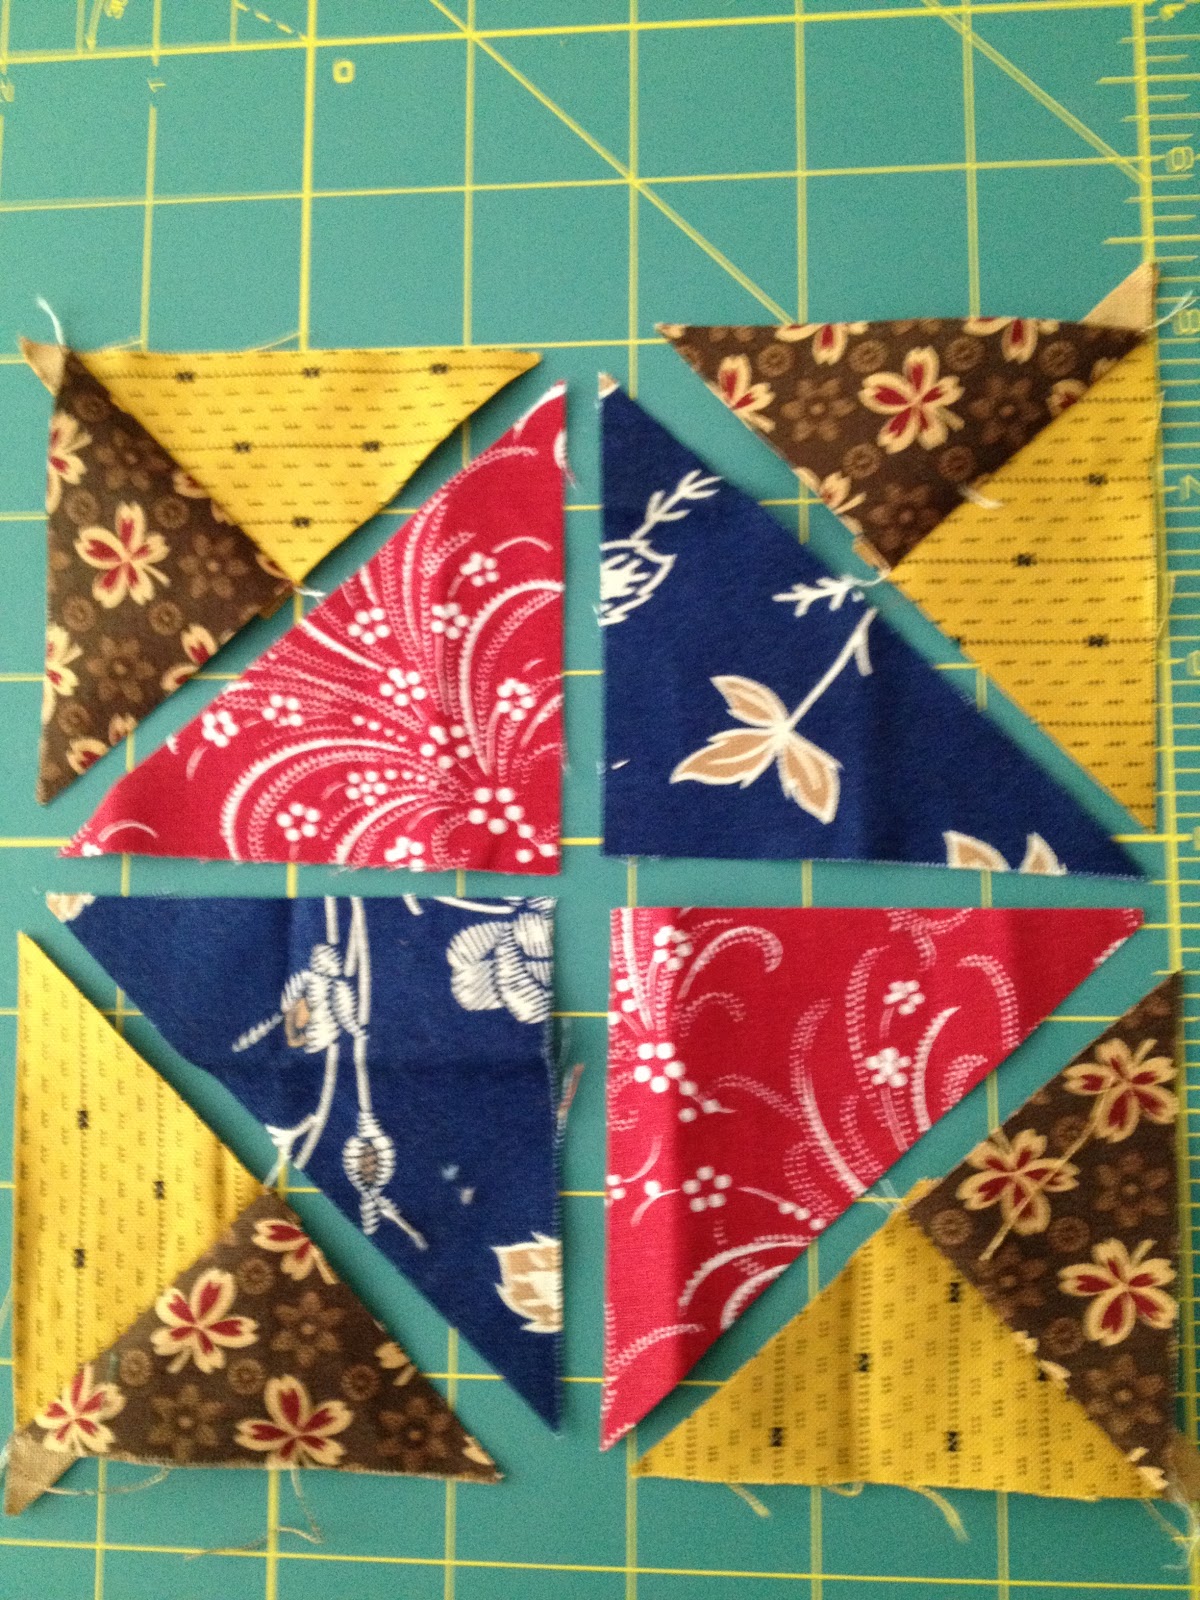
The pieced border consists of blocks that will finish at 4". (4-1/2" unfin). The block is called "southern belle" in Around the Block (a very old and great book, IMHO). Each block consists of four 2" (fin) blocks. There are two sets of two. For all four blocks, you will need two fabrics for the outside triangles. Cut two 3-1/4" squares TWICE on the diagonal. The picture came out a little blurry. Sorry.

You will need to sew each pair of triangles together on one side. Be careful that all four of them are sewn on the same side.

There will be two different "centers" for these 2" blocks. Choose two contrasting fabrics and cut them 3". Put them right sides together and cut ONCE on the diagonal.

I then lay my pieces out on a surface near my sewing table.. I'm a very visual person and need to see it laid out.
You can see that you want to lay it out so that your different "centers" are opposite each other. You will now sew each unit together (the larger triangle gets sewn to the unit with the two little triangles). I press towards the larger triangle since it's not pieced.
Each of these units needs to be squared up so that they measure 2" unfin
(1-1/2" fin). I have an old ruler called the Precision Trimmer that is perfect for this squaring up. I also just bought a new one called the Tucker Trimmer which does the same thing. Or you can use any other ruler you have on hand. A girl can never have too many rulers, right??
You're then going to sew all 4 units together, again being careful that you sew it as you laid it out, with the large triangles opposing each other.

These four little 2" blocks, when sewn together, will measure 4-1/2" unf;
or 4" fin. This is one of the blocks I used in my medallion, which is why the fabrics are different than above. Sorry! Hope it's not confusing.
Please make a total of 24 of these blocks. Mine are all scrappy. Sew two sets of 5 blocks together and attach to the top and bottom. Then sew two sets of 7 blocks together and sew them to the sides. I tried to sew them together so that the darker of the large triangles weren't always going in the same direction. That didn't always work but it was the plan anyway!

I think Lori will be posting the final applique border instructions in two weeks or approx. June 11th. Knowing Lori, it'll be right on time!!!
I hope you're enjoying this little project we designed. Please be sure to post pictures on Lori's linky thing on her blog.
Love to you all,
Randy
I think I can. Great directions.
ReplyDeleteThank you for the tutorial--beautiful quilt
ReplyDeleteI forgot how cute your quilt is! Nice block tutorial, girlfriend!!
ReplyDeleteI love the colors Randy! And the pattern is really cute. cheers, CW
ReplyDeleteVery cool! Thanks for the tutorial :)
ReplyDeleteWow this is really starting to look awesome! love your fabrics!
ReplyDeleteI'm ready!
ReplyDeleteYours really is more of a planned scrappy with the pink and white dots in each of the blocks. It looks terrific!
I am enjoying this sew along and learning new methods of cutting too.
Thanks :0)
Happy Sewing
Oh, love that!! I am workin' on it!!
ReplyDeleteThank you for the instructions Randy. I have started cutting my blocks today, but I am confused. :( I can't get the blocks the right size.
ReplyDeleteCould you please email me mjnorindr@gmail.com
All fixed now. Thank you.
DeleteI'm just starting these blocks and I'm a bit confused, with the 3" squares, you are showing 4 triangles, does that mean we cut the square twice and not once, or do we make 2 lots of squares? thanks :-)
ReplyDeleteDoh! as soon as I laid everything out, it made sense LOL
DeleteVery pretty, love the bright colors!
ReplyDelete