Pages

Friday, January 29, 2016

Can never have too many bags

I've been wanting to make a particular bag with a kit I got a while ago in Wisconsin. Finally tackled it but sweated over it quite a bit. 
Maybe it's the lawyer in me but have you ever thought that the people who write instructions must not be native English speakers!!!

Here is the pattern:

First portion:

Completed:

All the fabrics are sewing related!!

My dh and I spent a night in SF this week and I had to take a picture of the Bay Bridge!  Everyone is getting crazy for the super bowl! I think these lights are so dramatic!

Thursday, January 28, 2016

Giveaway!!

I haven't been able to get a whole lot of sewing done recently , which is very sad!  However, I'm gearing up!

Part of my plan for 2016 is to unclutter my life's possessions!  Have you heard about that book telling you how to get rid of stuff?  This author's "test" is whether the item gives you joy or not.  If not, get rid of it.  I can say that it helped me fill two Goodwill bags... I have a long way to go.

In keeping with that approach, there are several books I haven't looked at in years and I'd like to give them away.

"Showstopping Quilts to Foundation Piece"

"Clever Quarters, too"

"Quilt in a Day, Log Cabin Pattern"


All you need to do is tell me what you hope to do differently this coming year.  I am looking for inspiration!!

I'll draw 3 winners on Monday!!


Tuesday, January 26, 2016

Second step for bullseye quilt

Two weeks ago we cut all the circles and backgrounds. We also sewed the merge circle down. 

I like to trim the back of the large circle and can reuse the discarded fabric. So very carefully separate the back of the circle for the newly sewn unit and cut a small slit. Then you can very slowly trim the excess circle close to the seam line. 


Set the excess part aside. 

Now take the 5-1/2" cut circle and sew it on top of the first unit. 
I like to trim the back again. 


Now one more circle goes on the top. This is the small 3-1/2" circle. Now is a great way to reuse the first cut out from the back. 

You can trim the back again to reduce the bulk but it is much smaller so you need to be careful. You can wait to do that until the next step. 
Now your homework is to get all your blocks sewn in this fashion. Make as many blocks as you think you'll need for the size quilt you want. 

I'll post the next step in two weeks on Feb 9!

Monday, January 25, 2016

Bullseye tomorrow

Be ready for tomorrow's instructions for step 2 of the bullseye instructions!!

In the meantime, how do you like this little kit I picked up from Country Sampler in Spring Green, Wisconsin??  Can't wait to start it. Pretty appropriate, don't you think??!!


Friday, January 15, 2016

A little sewing

I decided that Emma and Ryan need pillowcases so yesterday I got all the fabrics and whipped these up!!

I think they'll be very excited to use them this weekend when they stay with us !


This is Emma's favorite dress:

And this is how cute Ryan is:

Can't forget Jack:


Have a great weekend!

Tuesday, January 12, 2016

Bullseye instructions

Here we go!! Ready???

First you'll need the background. I chose squares that were 9-1/2"   
I like lights but they don't have to be white by any means. 

Each block requires 4 squares. It'll yield 4 blocks. 

Next are the circles. There are 3:
Outside one is 7". I cut a piece of paper using a compass (or a bowl)

Middle circle is 5-1/2"

Last one needs to be 3-1/2". These don't have to be exactly those sizes. You just want them to be smaller as they go in. 

I take these circles and fold them in quarters:

You can start to pick out fabrics. There needs to be contrast between circles. The larger circle is going next to your background so it needs to contrast with the background. 

The 5-1/2" circle is going on top of the large circle so there needs to be contrast between the 2 circles:

The 3-1/2" circle is going on top of my red one so I want something contrasting again. 

How many will you need? That depends on how large you want your quilt to be. A block will finish at 8":

My quilt has 48 blocks, 6x8, and has a 4" border. It is 56x72. 


Now you can start to cut out your fabrics. I put the folded circle onto fabric folded in quarters (after measuring to be sure the fabric is large enough obviously)!!

Remember that each block requires 4 different fabrics and will yield 4 blocks. 


Then you can cut it along the edge. You don't even need to pin it unless you want to. Remember this is all raw edge appliqué so it doesn't have to be exact. 

I'm going to recommend that you cut your background squares and the first large circle for this first installment.   Center the large 7-1/2" circle on the background square and stitch along the edge of the circle approximately 1/4" from the edge.  For my size quilt, you'll need to do this 48 times! Remember this doesn't have to be perfect. No need to pin or measure or mark!!


That's it for this part. In 2 weeks on January 25, we will cut out the other circles and sew them down on top of each other. 

Two weeks after that we will cut the squares apart and resew them together. 

Let me know if you have any questions.

A number of you asked which doll quilt I took home from Wisconsin so here is my winning:

This was made by my friend Debbie Dodge who does the most gorgeous appliqué around!!  I love it!!

The one I made was this one:
It was a lot of fun and we are already planning next year's swap!!

Monday, January 11, 2016

Doll quilts

Here are the doll quilts that were made for our holiday exchange. There were some major battles when it came time to take one away from someone!! I think everyone was happy at the end of the night, though!!
There are some very talented women in this group!!

Anticipation!!


Some close ups:


This is me and my dear friend Terri. She was being silly, especially after we shared a couple of cocktails! Note that my glass is empty!! Vbg 

Bullseye instructions tomorrow!!

Sunday, January 10, 2016

Size does matter

Thimbles 2.0!!!

I brought my thimbles attempt with me to Wisconsin, confident my friends could help me figure out the problem. 

I may have neglected to mention that I had been sewing the thimbles together on 3 different machines. Duh!!  The seam allowances were very different and on such small pieces, even an 1/8th makes a big difference!!

I tried to fix them but decided it was easier to start over!
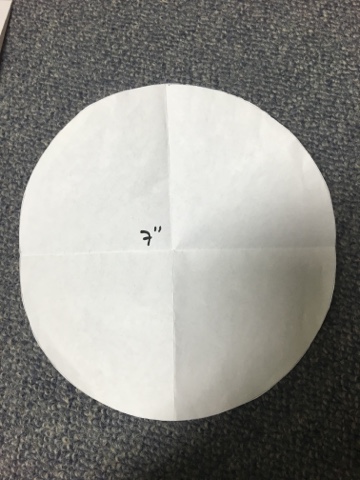
Before:
You can't see that I really had to stretch the seams to match them up. Not a good idea with bias edges!  Some seams looked gathered!! Eeeeeewww

Here's the Thimble  quilt 2.0:
Now if you look closely you'll see how imprecise my sewing is. I wanted them to alternate light/dark but that didn't work all the time. In my book, it's good enough. Perfect is overrated and I'm not expecting the quilt police to stop by! The good news is that all the seams are 1/4" and they (mostly) line up!! I'm going to add a little border. I'm pretty happy with it!

We had participated in a swap last year and two of our group of 18 got theirs done already. I know where my zip lock Baggie is with my project so I am happy with that!!


Close up of Pat's:
I love her choice of colors for the setting squares, triangles and border. We all made and swapped the half square triangles using triangle papers so they are all exactly the same size!   The blocks finish at 3"!! Janet O: these blocks are for you!!

Here is Cathy's:

Isn't it amazing how different they look with different setting fabrics?

Cathy Jass also worked on a kit she bought a couple of years ago from Country Sampler in Spring Green. It's one of a kind of shop! I just love the colors of this:

Before the borders were added

Terri Clementi was working on this just before I had to leave for the airport. She said this is a perfect layer cake quilt pattern:

I found another small quilt in one of the bedrooms and thought tit was a great little doll quilt :


So simple  but very dramatic!

Of course we had to hit at least one quilt store so we went to Loose Threads in Milton yesterday and I just loved this quilt which they were selling as a kit. 
 You can't tell that the "appliqué" blocks are from a cheater cloth!! I bought the panels for that and figured I could use my Farm Girl Vintage fabrics for the rest. 

Tomorrow I'll show you all the doll quilts that were made as part of our holiday gift exchange. 

I'm heading back to California this afternoon and will be happy to be back on the West Coast, where it may be soggy but it's in the 50s. It was a brisk 9* this morning in Janesville!!  I do love my trips to Wisconsin, though, even with the cold temps. I have a wonderful group of friends and feel very lucky!!
I need this sign;

Remember tomorrow is bullseye day!
My friend Pat pointed out to me that I did the same sew along two years ago... Do I remember?? Heck no.  Hope no one minds!!